Wix
We provide a custom element for seamless Wix integrations. Please follow the steps below to add and configure the FIXR Ticketshop on your Wix site. Note: Adding custom elements requires a premium Wix plan.
Installing the Ticketshop on Your Wix Page
- Open the Wix Editor and click Add Elements on the left side of the editor.
- Navigate to Embed Code and select Custom Element to add it to your page.
- Click Choose Source.
- Select Server URL and paste the following URL:
https://web-cdn.fixr.co/scripts/ticketshop-custom-element.v1.min.js - For the Tag Name, enter:
fixr-ticket-shop
Configuring the Ticketshop
Go to the FIXR Organiser platform and either create a new ticketshop or select an existing one.
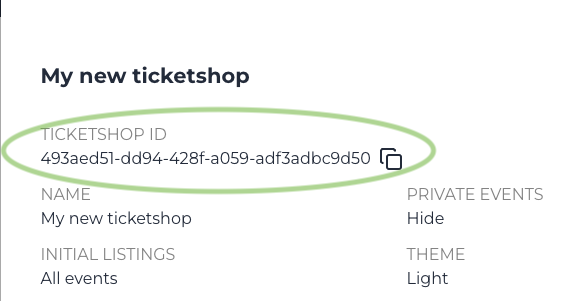
- Make note of the ticketshop ID for the ticketshop you want to use, you can find this under ticket shop details:

- Make note of the ticketshop ID for the ticketshop you want to use, you can find this under ticket shop details:
- Return to the Wix Editor and navigate to the page where you added the custom element.
- Select the custom element and click Set Attributes.
- Click New Attribute and:
- Enter
data-fixr-shop-idas the Name. - Paste your FIXR ticketshop ID as the Value.
- Enter
Advanced Configuration
To further customize your ticketshop, repeat the attribute process to add additional valid data attributes. For more details on advanced setup options, refer to the Advanced Setup.