Wix
We provide a custom element for seamless Wix integrations. Please follow the steps below to add and configure the FIXR Ticketshop on your Wix site. Note: Adding custom elements requires a premium Wix plan.
Installing the Ticketshop on Your Wix Page
- Open the Wix Editor and click Add Elements on the left side of the editor.
- Navigate to Embed Code and select Custom Element to add it to your page.
- Click Choose Source.
- Select Server URL and paste the following URL:
https://web-cdn.fixr.co/scripts/ticketshop-custom-element.v1.min.js - For the Tag Name, enter:
fixr-ticket-shop
Configuring the Ticketshop
-
Go to the FIXR Organiser platform and either create a new ticketshop or select an existing one.
-
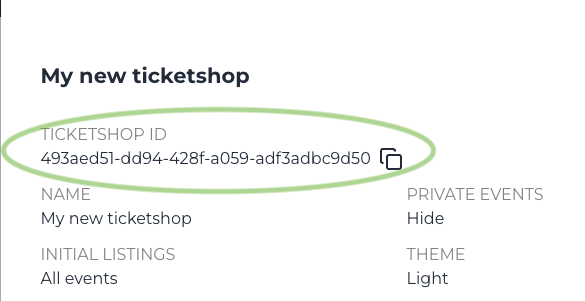
Make note of the ticketshop ID for the ticketshop you want to use, you can find this under ticket shop details:
-
Return to the Wix Editor and navigate to the page where you added the custom element.
- Select the custom element and click Set Attributes.
- Click New Attribute and:
- Enter
data-fixr-shop-idas the Name. - Paste your FIXR ticketshop ID as the Value.
Advanced Configuration
To further customize your ticketshop, repeat the attribute process to add more data attributes. The Wix custom element supports these attributes from the Advanced Setup:
data-fixr-themedata-next-event-headingdata-upcoming-events-headingdata-name-filterdata-description-filterdata-after-filterdata-before-filter
The custom element doesn't pass on data-enable-pixel or data-enable-gtm. To use the Meta Pixel or Google Tag Manager plugins on Wix, turn them on in your ticket shop's analytics settings in the FIXR Organiser instead.